Google pay bank account offers a simple process to send or receive money between two persons, provided both persons should be able to use the Google Pay application. In this advanced and fast-moving world, this application is an essential tool that gives us the necessary facilities to transfer money instantly. But, quite often, some users may encounter some problems while using their Google Pay app. And for that reason, they may get frustrated. For example, the Google Pay app not working is a prevalent issue. This situation may occur due to so many reasons. Several ways can fix this situation.
You must add a bank account to set up a Google Pay account for sending and receiving money. Sometimes, while using the Google Pay app, you may face different problems and errors in the process, such as if you have uninstalled or reset your mobile phone and, once again, when you try to install a Google Pay account, make a new UPI ID. Still, you can not add your account, and your mobile screen shows “Couldn’t register. Make sure your mobile phone number and SIM card are in your phone. Retry.”
Common errors:
- Your bank server didn’t respond
- Bank account couldn’t be added due to an SMS timeout
- Couldn’t register make sure your sim card is in your phone
- No SIM card was found in the phone
If you are facing a problem in adding your account to your Google Pay app, then don’t worry; this article is for you. This article shares all the essential information so that you can understand the method to solve the Google Pay bank account adding problem and do the needful in this regard.
How to Solve Google Pay Bank Account Adding Problem
While using the Google Pay bank account, suppose you are facing problems like not being able to add your account to the Google Pay app and being unable to proceed further. Then you can follow the below-mentioned authentic information, simple instructions, and some easy steps for the same, such as:
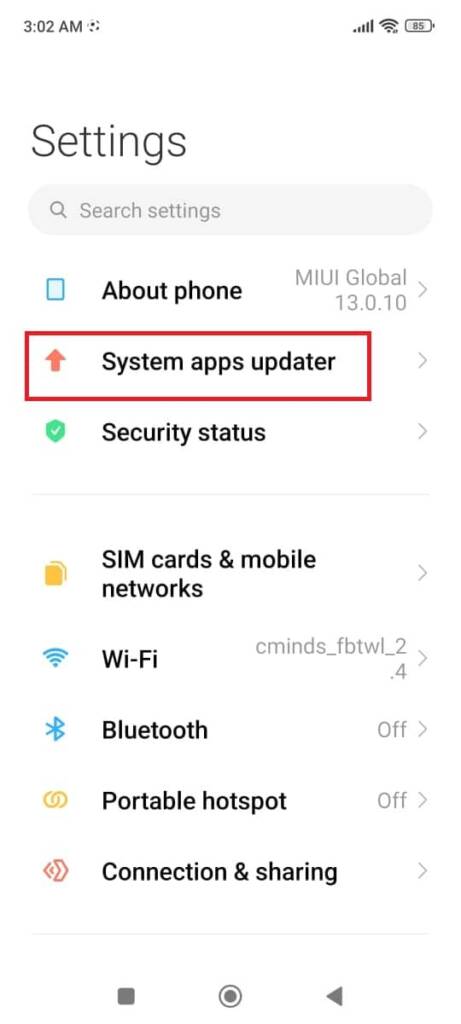
Step 1: Firstly, open your mobile, then search and click on the Settings icon at the top right of the mobile screen. A new page will open before you, showing the settings title, where you can see many options and click on the system apps updater option.
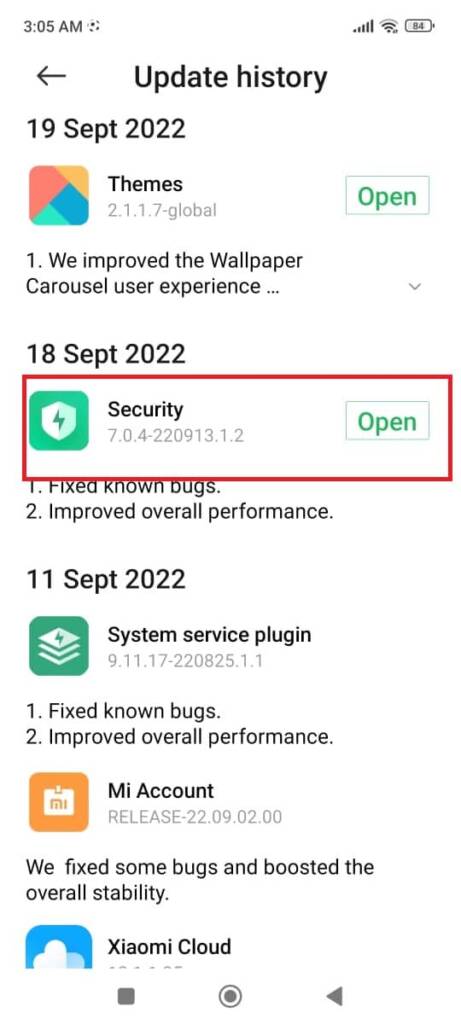
Step 2: After that, again, a new page will open before you, showing the Update History title, search for the Security app there, and update this app if an update is available. Otherwise, it will show open.
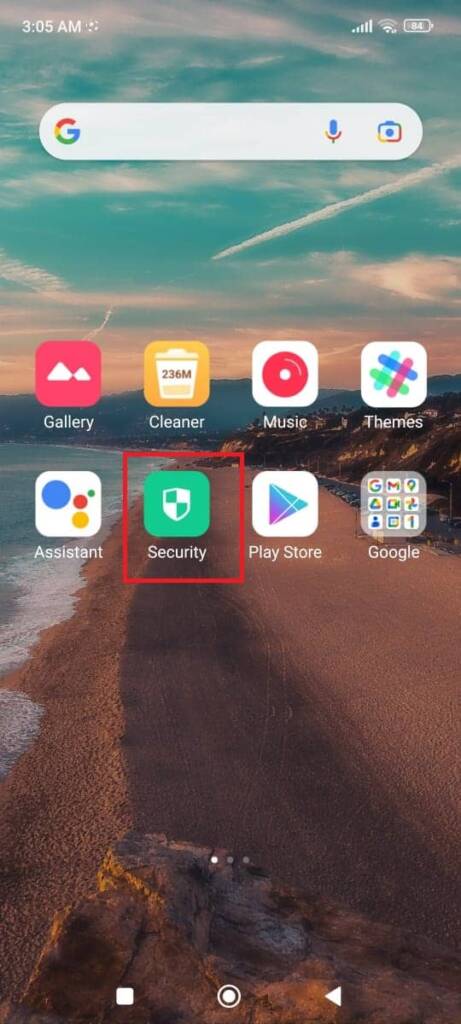
Step 3: Visit the mobile home screen and click on the Tools folder. A new page will open before you, showing the Tools title, where you can see many options, Search and click on the Security app there.
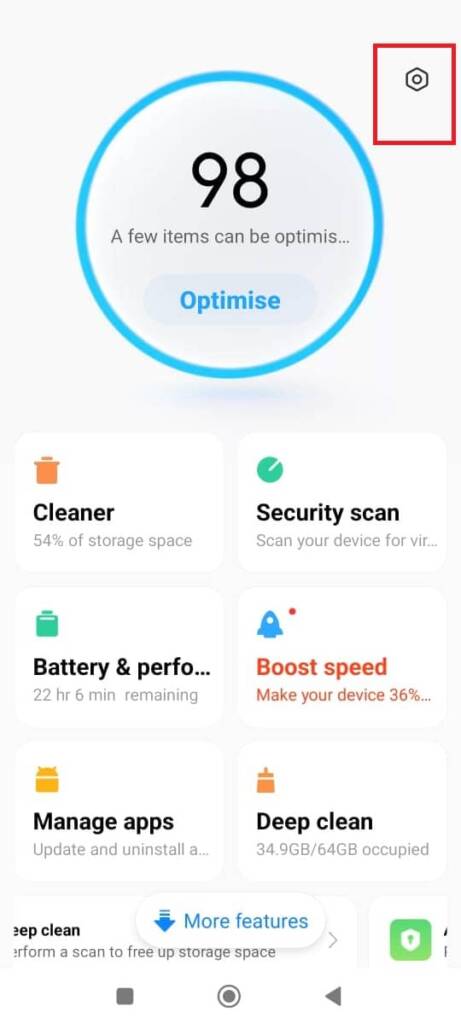
Step 4: A new page will open before you, showing different scanning options, click on the setting icon at the top-right of the mobile screen.
Step 5: Now, a new page will open before you, showing the Settings title, where you can see many options.
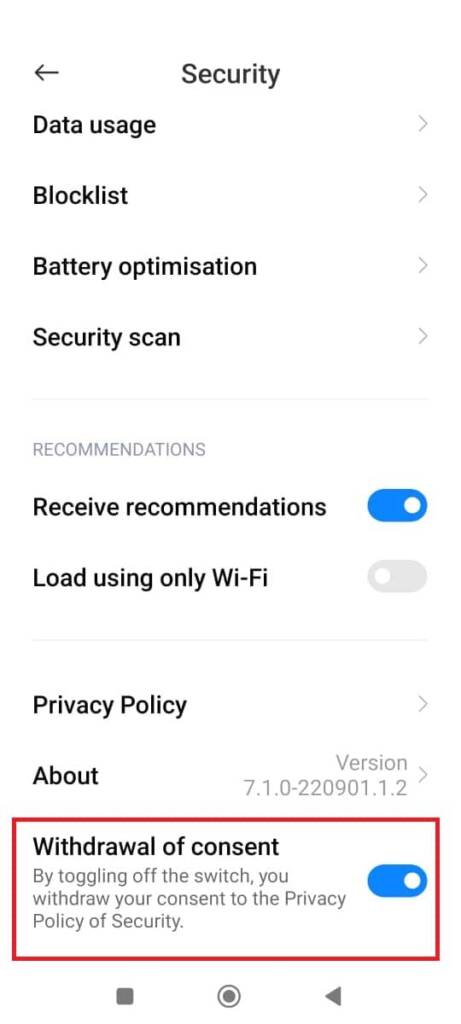
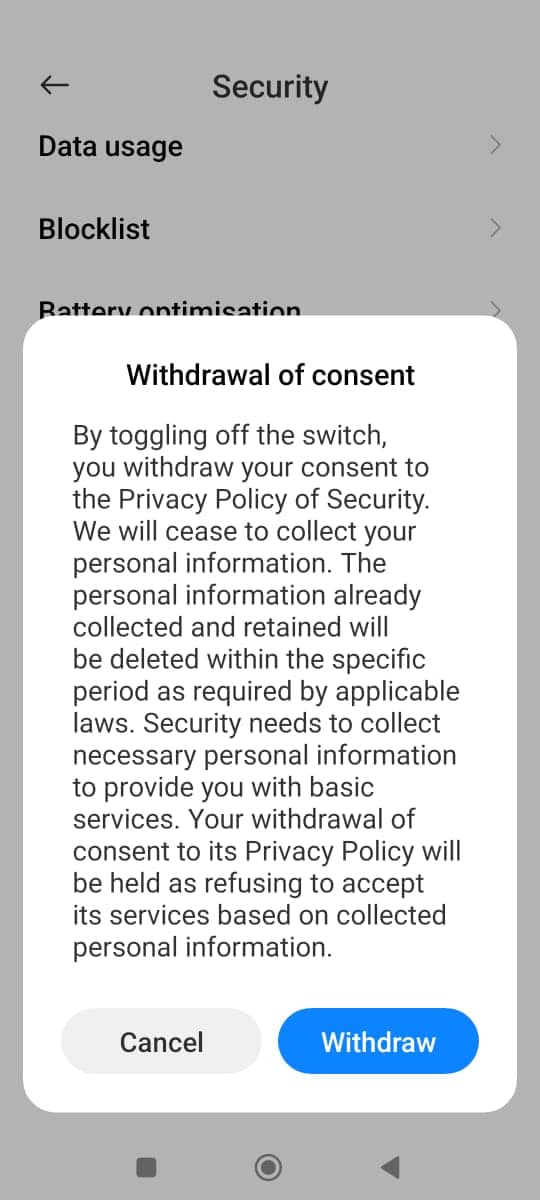
Scroll down to search and click on the withdrawal of consent option, which will be in the activated position > Deactivate this option > Click on the withdraw button.
Adding a Bank account in Google Pay
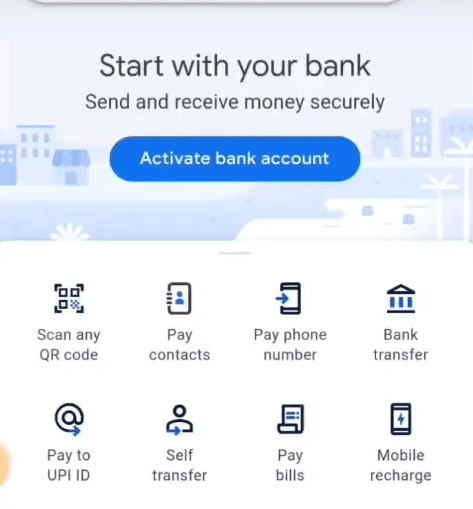
Step 6: Open your Google Pay account. A new page will open before you, showing the Start with your bank title > Click on the activate bank account button.
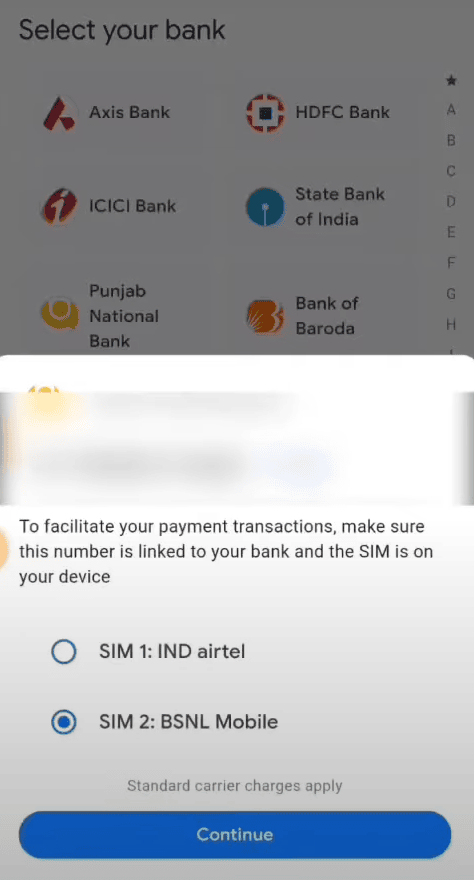
Step 7: Now, enter your bank’s name in your mobile search bar and search for it. Now, you will see different bank names on the mobile page > Select your bank there. List of Banks like Axis Bank. HDFC Bank, ICICI Bank, State Bank of India, Punjab National Bank, Bank of Baroda, and many more, you have to choose one bank from the list.
Now, a new page will open before you, showing Choose SIM options > select the correct SIM 1 or SIM 2 slot for your registered mobile number. For example, if your registered mobile number SIM exists in the SIM 1 slot, select SIM 1 slot > click on the CONTINUE button.
Now, you will receive a message on your mobile screen “Allow GPay to send and view SMS messages? > Click on the Allow button. Then you will receive a message showing “Sending SMS…” But you must ensure that you have an SMS facility on your mobile phone. Then you will receive a message showing “Verifying number…”
Finally, after proper verification and finding the account linked with your registered mobile number, that account will be added to the Google Pay account. Following the above helpful information and simple instructions, you can easily add your bank account to the Google Pay account.
Conclusion
Suppose you were trying to search for a way out in this regard and wanted to know how to solve the Google Pay bank account adding problem. In that case, we expect you to quickly solve such issues after carefully going through and following the above-described information.
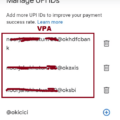
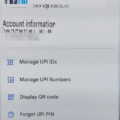
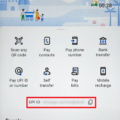


Many of the options suggested were not reflected in my mobile One+-6 Android Ver 11. Ci could not reach to Withdrawal of consent