IndOASIS is the new and technically more advanced mobile banking application of Indian Bank after the IndPay app. This app has included some additional features that the IndPay app didn’t have earlier. This application allows Indian Bank’s customers easy access to a number of financial and non-financial services offered by the bank.
Such services include accessing/carrying out Fund transfers using IMPS/NEFT, schedule of fund transfers, opening e-Deposits, PPF accounts, Recharge/Bill Pay, Mutual Funds, Card services, and other value-added services. Customers/non-customers of Indian Bank can use the UPI facility integrated with IndOASIS.
Moreover, now, Indian Bank’s customers would be enabled anytime and anywhere to access and buy general insurance products digitally through this digital collaboration on Android and iOS platforms.
Indian Bank has extended pre-approved personal loans to self-employed customers of the bank while it was only offered to salaried customers and pensioners.
Earlier, Indian Bank was offering an e-overdraft facility for e-deposits only. But now, it has extended this facility against term deposits opened at branches by individual customers also. This bank has launched a digital “E-Broking” solution, which allows its customers to open a Demat and trading account facility.
IndOASIS is a safe, convenient, and easy-to-use application with a host of features to help users follow their finances on the move. If you are a user of the IndPay app but now you want to switch over from IndPay to IndOASIS, then you should know the registration process for Indian Bank IndOASIS mobile banking.
Steps to Register for Indian Bank IndOASIS Mobile Banking
If you have decided to switch over from the IndPay app to the IndOASIS app to make easy access to the bank’s magnificent financial and non-financial services, but you are still doubtful and wondering how to register for Indian Bank IndOASIS mobile banking, then take it easy. You are at the right site.
We are going to provide you with complete solutions in this article. Just read this article and follow the below-written simple tips and instructions to learn and take necessary action, such as:
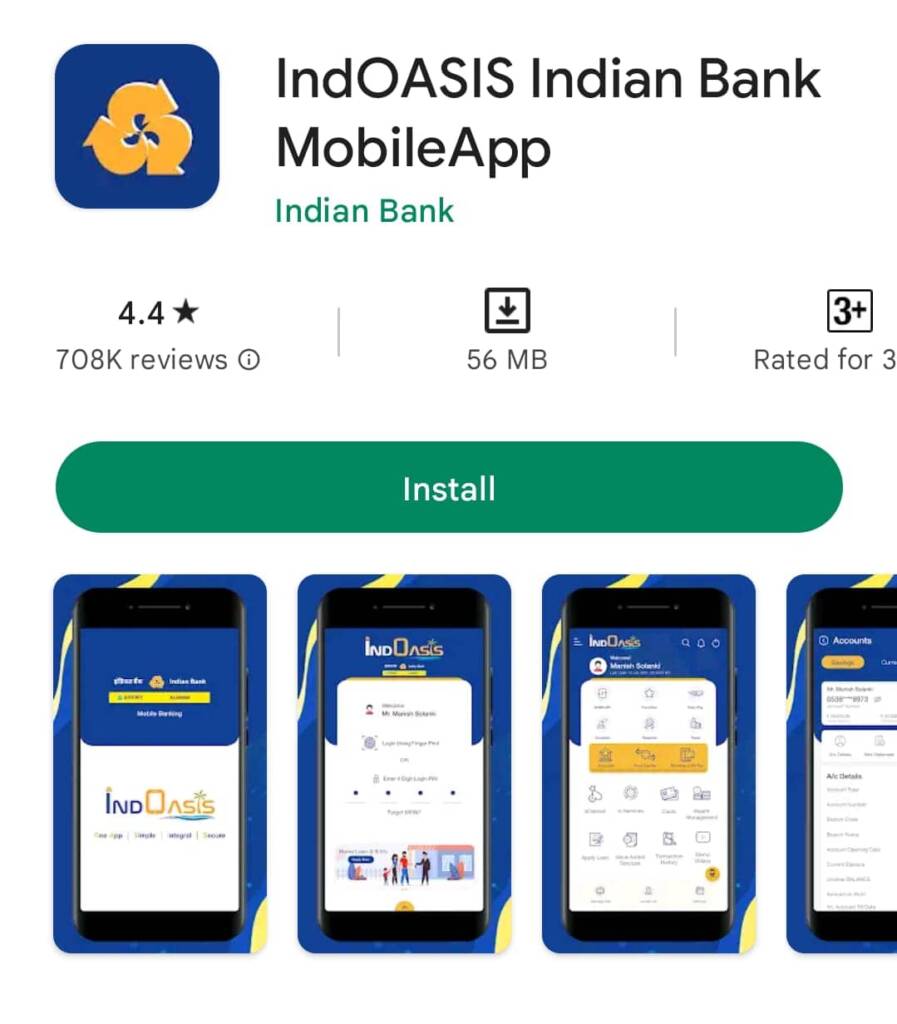
Step 1: First, download the IndOASIS Indian Bank Mobile App from the Play Store or Apple App Store and open the app.
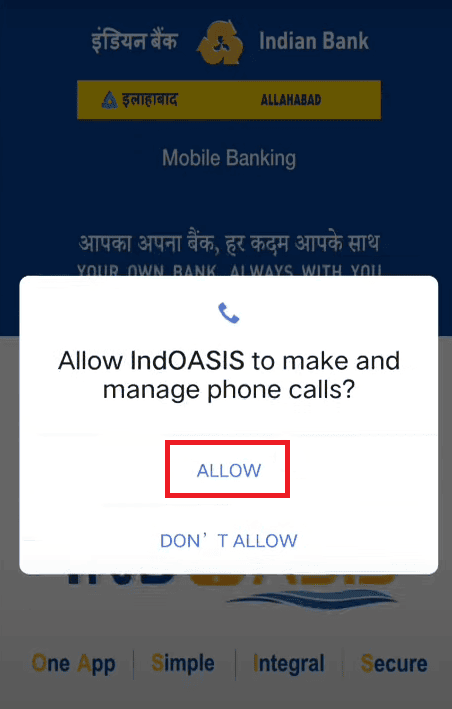
Step 2: Provide all required permissions to the app: such as allowing IndOASIS to access this device’s location, enabling IndOASIS to make and manage phone calls, and so on.
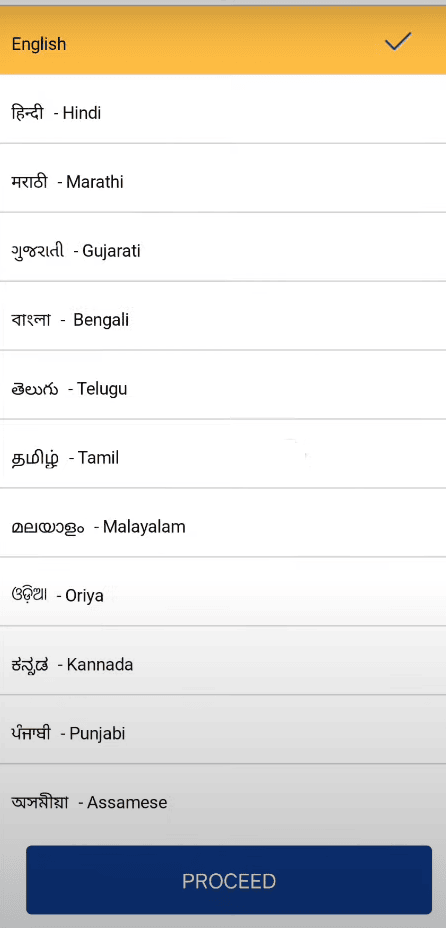
Step 3: Select your language to use the app and click the Proceed button.
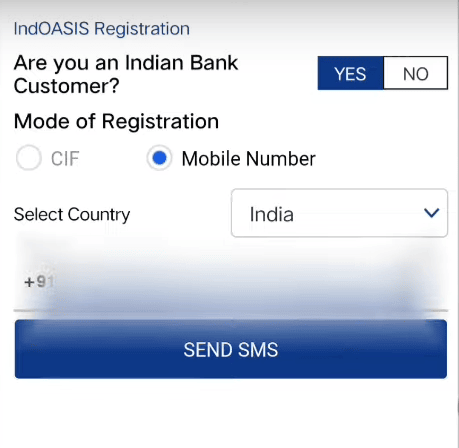
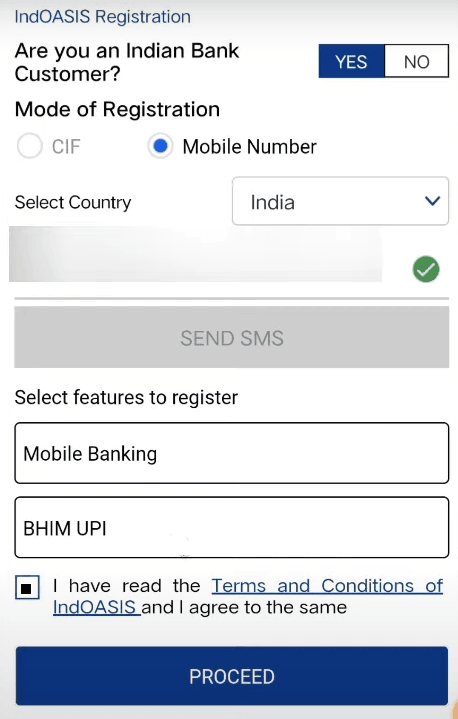
Step 4: Click on the CIF option or your registered mobile number option and enter the required information, then click on the SEND SMS button. If you have two sim cards on your mobile, then choose the registered mobile number to send an SMS.
You will receive an SMS stating that your registered mobile number with the bank, or your 11-digit CIF number, is being verified. After verification, you will see a green-color right tick on your mobile screen.
Step 5: Now, a new page will open before you, showing you the two options: Mobile Banking and BHIM UPI. You can select both options for your registration. For example, suppose you select only the Mobile Banking option and tap on the small box to accept terms and conditions. Click on the PROCEED button.
Now, you will receive a message on your mobile screen stating that You are about to register for Indian Bank Mobile Banking Services. Do you want to continue? Click on the OK button.
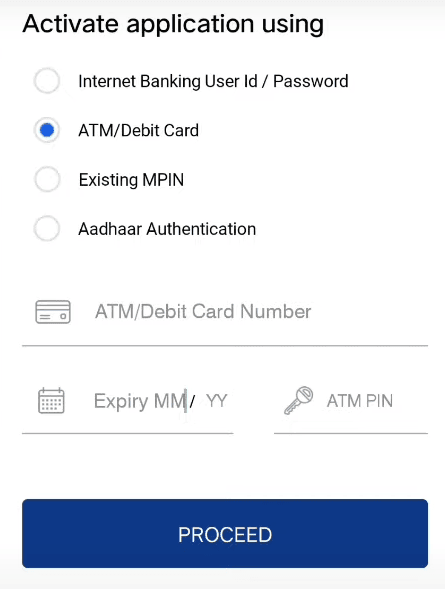
Step 6: Now, a new page will open before you, showing you the “Activate application using” title and three options: “Internet Banking User Id / Password,” “ATM/Debit Card”, and “Existing MPIN.”
You can select any of the three options, here we are selecting ATm/Debit card option, enter the required atm card details, and click on the ACTIVATE button.
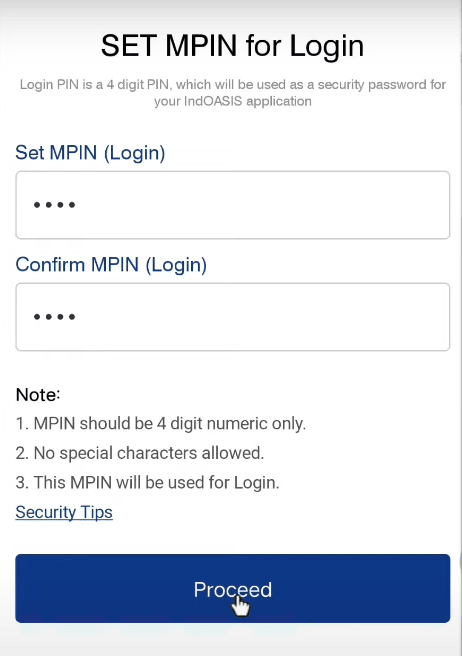
Step 7: Now, you will be asked to set a 4-digit MPIN for login. After placing your login MPIN, enter it, then re-enter it for confirmation. Click on the PROCEED button.
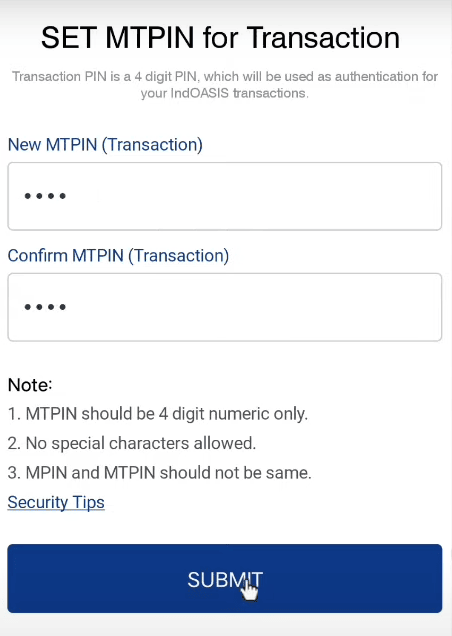
Step 8: Next, you will be asked to set MTPIN for the transaction. After placing your four-digit MTPIN, enter it, then re-enter it for confirmation. Click on the SUBMIT button.
Now, you will receive a message on your mobile screen stating that your registration has been completed successfully. Please log in to continue using the IndOASIS application. Click on the OK button.
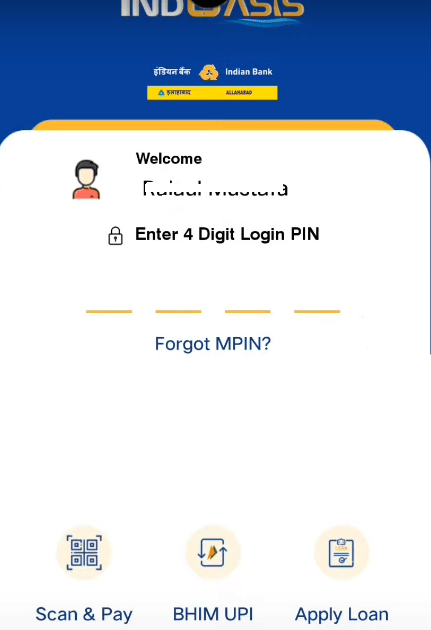
Step 9: Now, a new page will open before you, and you will be asked to enter your four-digit login MPIN. After entering it, click on the OK button. You will then receive a message on your mobile screen stating that you Allow the app for fingerprint authentication.
If you want to use this safety feature, you can click on the YES button; otherwise, you can click on the NO button. To activate your fingerprint login activation, you will have to place a finger on your device’s fingerprint scanner. Then you will receive a message stating that your fingerprint login activation has been successful. Now, click on the OK button.
Now, a new page will open before you, click on the white-color GOT IT NEXT caption at the bottom side of your mobile screen.
After that, a new page will open before you, showing you different options, such as m-Passbook, Rewards, Scheduled FT, Accounts, Fund Transfer, Recharge & Bill Pay, Deposits, Cards, Wealth Management, Apply Loan, Value Added Services, Transaction History, Cardless Cash and more services under E-SERVICES: like Request Locker Facility, Change Home Branch, Email Updation, Apply for e-Services and Form 15-G/15-H.
By clicking on these options, you can easily use them as you need. So this way, you can quickly gain complete knowledge and learn how to register for Indian Bank mobile banking.
Conclusion
So if you were doubtful about Indian Bank IndOASIS mobile banking registration, we have provided you with simple and quick steps to help resolve your query. Following these steps, you can easily register for Indian Bank’s IndOASIS mobile banking services.
However, in case of any doubt or further queries, you may contact the Indian Bank’s customer support team. As a precautionary measure, you must refrain from relying on third-party applications and service providers to avoid fraud.


Be the first to comment