PNB ONE is a flagship Punjab National Bank application that helps you use banking services without any delays. From bill payments to money transfers, EMI payments to bank statement downloads— all the net banking services are available in this mobile app and make your life easy, instantly.
Another instant solution for all payments is UPI. In this article, you’ll get a step-by-step guide to setting up your UPI ID in the PNB ONE app. All you need to do is, spare 5 minutes and you’ll get the UPI ID without any issue.
Steps to Create UPI ID in PNB One App
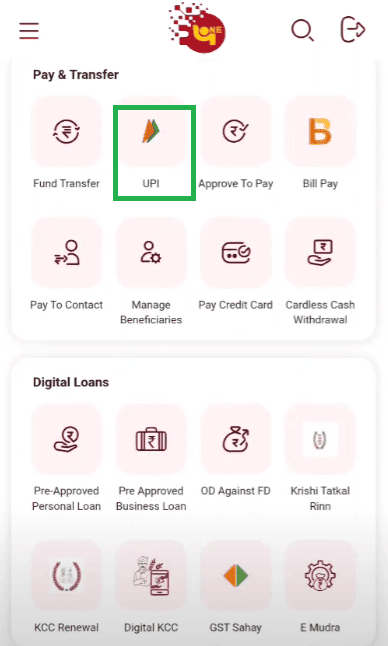
Step 1. Open the PNB One application on your mobile phone. On the home screen, you’ll be able to find a button named “UPI”. Click on that button. It will be available under the “Pay & Transfer” title.
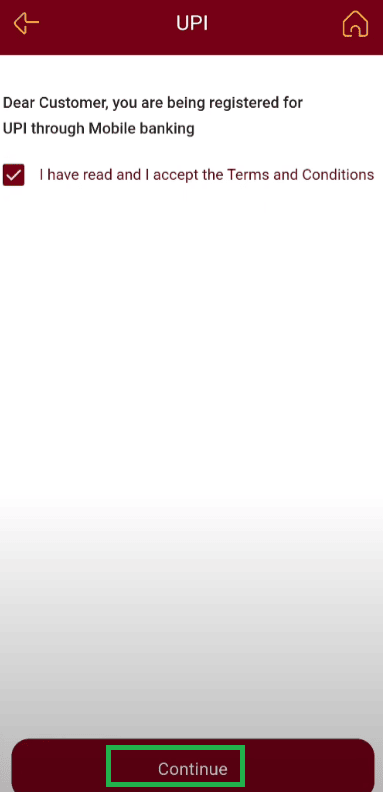
Step 2. You’ll be redirected to a new screen. Click on the checkbox to agree with the terms and conditions. Then click on the “Continue” button available at the bottom of the screen.
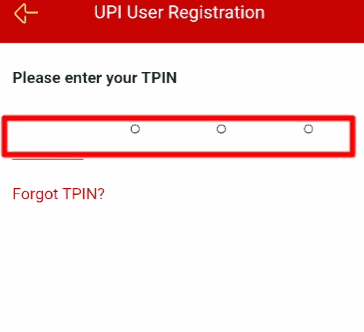
Step 3. Enter your TPIN in the next field displayed on the screen. It will be a 4-digit PIN that you’ve created during the PNB ONE app installation.
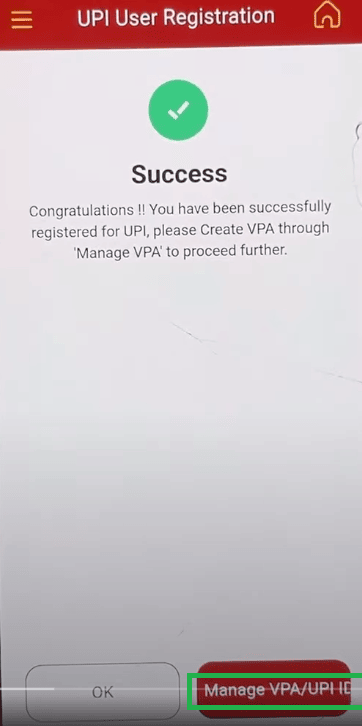
Step 4. A success message will be displayed if the validation is successful. Under the message, navigate to the “Manage VPA/UPI ID” button and click it.
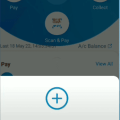
Step 5. Click on the “Okay” button if any popup is displayed. A ‘+’ icon will be populated on the bottom-right corner of the screen. Click on that button.
![]()
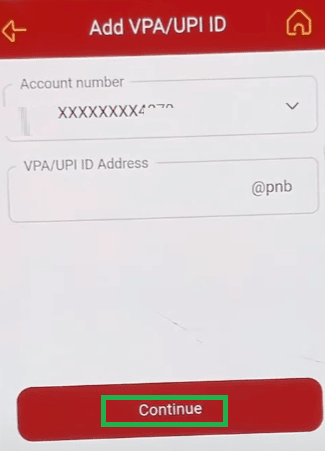
Step 6. Click on the “Account number” dropdown field and select your PNB account number. Only the last 4-digits of the account will be displayed. Verify it before choosing. Now you have to create your VPA (Virtual Payment Address). You can write anything as your unique VPA. It can be any number or name. Click on the “Continue” button once done.
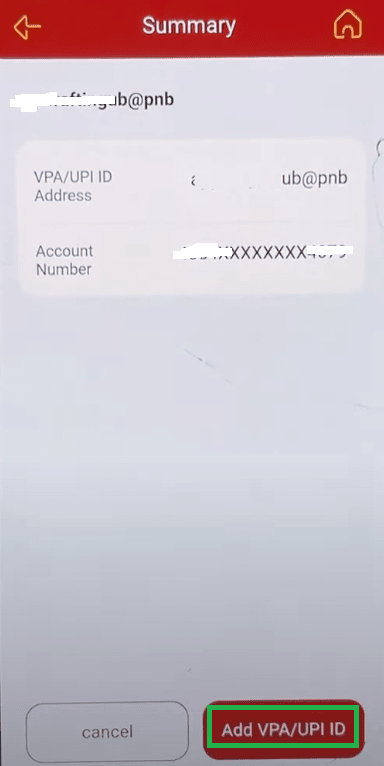
Step 7. On the next screen, your bank account number and your newly created VPA/UPI ID will be displayed. Note your UPI ID for future reference. Once verified, click on the “Add VPA/UPI ID” button. A success message will be displayed on the next screen.
On the top-right corner of the screen, you’ll find a home button. Click on that to go back to the home page. Click on the “UPI” button again. From the next screen, click on the first option: “Manage VPA/UPI ID”. You can see your PNB UPI ID along with the linked bank account number.
Conclusion
For better convenience with digital payment, a UPI ID is a must now. As you’ve created your UPI ID in PNB ONE, you’ll be able to use it for multiple purposes. Are you worried about security? All the UPI transactions are protected by two-factor authentication, which includes the UPI PIN and mobile verification.
This offers the highest level of protection for your financial transactions. So, use your UPI ID to transfer and receive payments in seconds. With the PNB ONE application, you’ll also be able to track all the transactions through UPI.


Be the first to comment